Terms, Contact Info, Recipe Index, and link love

12.16.2016

Mini Vanilla Tin Can Cake, and a Blogiversary


  Bad and good boyfriends, up and down hormones, driving across the country, 2 different college campuses, tiny kitchen apartments, bad and good days, this blog has been around for a lot of milestones and life changes.

  5 years ago today I created something that I honestly had no idea could've lasted so long.  Indigo Scones has pushed my creativity, patience, and organizational skills.  And I couldn't be happier with it.


  This year in particular has been quite a feat for Indigo.  I talked a lot in my last post about making some life changes, and pushing myself in new directions.  I can't say that the pieces are really coming together yet, but I can say that I'm pretty happy.  For the first time in months, I can look around at what I'm doing, and be more than okay with it.  Even though I'm still penny pinching and serving a slow-moving stream of tables during this already crazy Wisconsin winter, my day job now includes making some fantastic organic doughnuts for one of the best local businesses I've ever had the pleasure to work for.


  I'm surrounded by supportive people, I work with some amazing new women I can't wait to get to know better, and in my free time I can bake/do whatever I want.

  I made a good friend a rainbow layer cake for her birthday, and even though I ran out of time to fully document its glory, I figured out that the important thing is that it was so well received.  I'd rather walk up to someone I love with a gleaming, lit-up birthday cake and see some happy tears than put it up on instagram searching for some "likes".  I love doing what I do here, but sometimes I get so caught up in the social media and posting and whatnot that I forget that sometimes I just like to put my camera aside and bake my heart out.  The results when I do that more have been so gratifying.  I've been trying to do more of that, which is why you haven't been hearing from me as much.


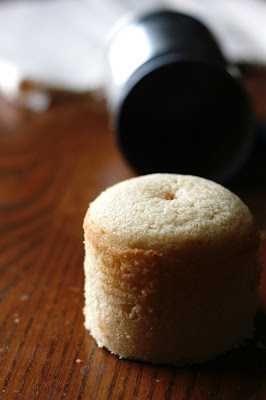
  But I'll be darned if I let 5 years of blogging slip on past me.  This needs to be commemorated.  While I'm a bit short on time and good health this week, I did find some stamina to throw together this tiny little cake for you.  I've been wanting to try baking a tin can cake for awhile, and I'm so happy with how it came out.  It's beyond adorable, requires no mixer, minimum dishes, and you can have done and decorated within 90 minutes.


  Playing around with slicing it was purely decorative.  You'd best believe that I just ended up savagely digging a fork into this while watching Friends on my laptop.


  So, if you're bored, have a sugar craving, or just want to make someone's day...make a little tin can cake.  I just threw together a quick cream cheese frosting to smear between the layers, but you can use whatever you want!  

  Thanks to everyone who's supported Indigo Scones this far in her career, I can't wait to see where this blog follows me next. <3


Mini Vanilla Tin Can Cake
Yield: one mini 3-layer cake

Ingredients:
  • 1 egg white
  • 2 tablespoons sugar
  • 2 tablespoons butter, melted
  • 1 teaspoon vanilla extract 
  • ¼ cup flour
  • ¼ heaping teaspoon of baking powder
  • pinch of salt
  • 1½ tablespoons milk

Directions:
Preheat oven to 350 degrees.  Spray a 15oz tin can with cooking spray and dust with flour, tapping to shake out any excess.  Trace and cut out a round of parchment paper and place it in the bottom of the can.  Spray and flour that as well.
In a bowl, add egg white and sugar and whisk until combined.  Add in vanilla and melted butter and stir until mixed.  Add flour, baking powder, and salt and stir until smooth.  Stir in milk.  Pour batter into can.
Bake at 350 degrees F for 20-25 minutes, or until a toothpick comes out clean.  Let cool in can completely, then invert cake and slide it out of the can (this can take a little tapping and shaking to encourage the cake to slide out). Slice the top off to level it, slice it into layers, and frost as desired.
Sources: adapted from The Baker Chick,


10.24.2016

Extra Dark Brown Butter Snickerdoodles


  I thought I'd found it.  I'd been to every advisor, run through every career test, and taken a wide variety of classes.  Walking down the stairwell of a library, I sent a group text to my family, trying to be happy with the announcement of my double major after so many undeclared semesters.

  Seconds after I reread the text, I stopped walking.  None of it felt genuine, none of it felt like me.  I saw books I didn't want to read, people I couldn't seem to fit in with or relate to, and so so much quiet stress bouncing around the numerous floors of the building.  Students in literal cells surrounded by books cramming their brains with something, all in an effort to make it in this world.

  I don't even know what making it means anymore.  A good job?  High-paying salary?  A resume?  A degree?


  But I shrugged it off.  You're crazy, Ellen!  Just overthinking all of it.  You love learning, this next year will be so great for you now that you've declared something.  You never try hard enough to get involved, just suck it up.

  Fast forward exactly 4 months.  A week into my classes I came out a crippled mess that was no semblance to any Ellen I've ever known myself to be.

  It's complicated.  But it's also not.  After 2 years of schooling and already taking one year off, I'm back where I started.  I have no idea what to do.


  I spent high school partially on the internet and with my nose in a cookbook.  If I wasn't doing that I was in the kitchen making treats for friends with my own catering business.
  If you've been reading this blog for any number of months/years, then you know I'm not kidding.  Making the hurdle into college basically shut down the regularity this blog/space had.  Anytime I was studying I would inevitably hop on here and browse through all my hard work and photographs and feel like I was mourning something.

  I don't like to think that I made a wrong decision somewhere, I don't really believe that at all.  I believe everything I've done up to this point has made me a stronger and more capable human, if sometimes a little bit embittered.


  All that said, I'm lost.  I don't feel the draw towards academia at all, but it gives me an eery feeling when literally everyone else my age is surrounded by midterms and textbooks and filled to the brim with complaints about it.  I feel like I'm cheating, or being lazy, especially since my grades were nearly always top notch.  But the fact is I don't know what I want with school at all, and I'd rather figure that out before I jump back in, if I jump back in.

  So in my drifting, I've been searching for some words.  For someone in a similar situation.  Whether that's a fictitious character in a novel, a blog post, a pinterest quote, a show on Netflix...I'm desperate for some affirmation.

  But, guess what, I'm never going to find that.  Affirmation about my own life decisions can only come from me.  So I'm biting the bullet and putting my whole messy quandary up here because I want somebody else also in an indecisive situation to also be able to see this and take comfort in the fact that they aren't the only ones struggling.  We all are.  I have yet to meet a person that really knows what they're doing or if they're doing it "right".


  Nope, I don't know a lot at this point.  But if there's one thing I do know it's that brown butter and dark brown sugar and an extra pinch of salt can make an absolutely fantastically deep and wonderful cookie.

  That was a lot of adjectives in what is definitely a run-on sentence, but describing these snickerdoodles to you absolutely requires breaking a few grammar rules.  Because honestly, at this point, I'm a little tired of regulations and societal expectations.

  So I just sit on my bedroom floor and eat half a dozen cookies and hope something brilliant comes to me pretty soon.  But if it doesn't, I'm willing to recreate these incredibly soft cookies as many times as necessary just so they can fill my tiny kitchen with their cinnamon-y comfort.


Extra Dark Brown Butter Snickerdoodles
Yield: about 2 dozen small cookies

Ingredients: 
  • 1 stick plus 3 tablespoons unsalted butter 
  • 1 cup dark brown sugar, packed
  • ½ cup white sugar
  • 1 egg plus 1 egg yolk
  • 2 teaspoons vanilla extract
  • 2 cups plus 2 tablespoons all-purpose flour
  • 1 teaspoon baking soda
  • ½ teaspoon salt
  • 3 tablespoons sugar
  • 1 tablespoon cinnamon


Directions:
Preheat oven to 325 F and line two baking sheets with parchment paper.
Place the butter in a small saucepan and heat over medium-low heat until you hear it starting to pop/sizzle.  Heat continually, swirling the pan occasionally, until the sizzling starts to subside.  Once it does, the butter will begin to brown, you then remove it from the heat and pour it into the bowl of your stand mixer or a large mixing bowl to cool down for a few minutes.

With an electric mixer, stand mixer, or just a whisk, mix in the sugars until smooth and well combined. Add the egg, yolk, and vanilla, and mix until smooth.  In a separate bowl, combine the dry ingredients. Gradually add them to the wet ingredients and mix until just combined.

Combine the 3 tablespoons of sugar and cinnamon in a shallow dish. Scoop dough into equal 1 inch sized portions, roll into balls and coat in cinnamon sugar. Place dough balls an inch apart on cookie sheets.

Bake for 10-12 minutes or until bottoms of the cookies are golden. Right after coming out of the oven, gently pat the tops of the cookies with a spatula to flatten and add some extra cracks.  Cool and then enjoy!

Sources: adapted from Baker Chick


10.03.2016

Roasted Parmesan Acorn Squash with Golden Smashed Potatoes


  I saw a lot of my summer through rose-colored glasses.  

  But now, autumn is telling me that as beautiful as those rose-tinted moments were, everything was not as it seemed.  That's the thing about seeing the world through a tinted lens, it's short-term, and more often than not hides a fairly black and white reality.


  I hope someday that I can say I don't regret the decisions I had to make when those rose-tinted glasses were cruelly snatched from my face.  I spent a series of days/weeks holding the shards of what once was, and ultimately had to realize that it was never anything at all.  Friends fade, relationships dwindle, and future plans take a different turn.  And while those rosy moments shine on when we smell certain things and drink certain drinks, ultimately we know that they can never live again, and maybe they never really even did.

  And that is sad, and I'm sorry it is sad and that this post comes across as quite sad, too.  But this is autumn, and while I'm still stinging from the cuts of broken rosy glass, I can't help but find comfort in seasonal recipes while everything around me tucks away its greenery and embraces the bittersweet change that the north wind can bring. 


  Right now, taking care of myself means learning to wield a knife again.  It means buying myself good food and eating it.  It means that I am worth the effort of grocery shopping and a simple, but elegant meal.  And if that's as far as I get right now, then goddamnit I'm doing pretty good.  


  I thought I had nothing in the way of real people food during a particularly dreary afternoon/late morning.  Then I found the acorn squash I bought nearly 2 months ago, weeks before I waved goodbye to my very first apartment and embraced my old roommate.  I found onions and garlic and potatoes that I bought on a whim when the neighborhood grocery store opened.  The feel and look of a Yukon Gold is nothing short of magical to someone who likes potatoes as much as I do.  Then there was the container of shaved parmesan I purchased when I decided that a bit of flavor would do me good, and the half sticks of butter I got to make my ex's parents a cheesecake.

  Call me crazy, but every ingredient in here has some kind of story.  And somehow in combining all of them, it made a little temporary balm for a weary soul and hungry stomach.


  I know I've gotten pretty hoity-toity on this blog about cooking for scratch and making your own caramel and whatever, but the reality of it is that sometimes it's really damn hard to even get yourself out of bed, let alone fix yourself a meal that you know only you will eat.

  But that's why this is important.  These potatoes, this squash, you slicing up a couple of onions, it's important.

  Keep eating, cook your way through the seasons and the curveballs life continually tosses.  No matter how simple the meal is, it matters, because you matter.

  Apologies for the inadvertent depth this post ended up reaching, but I'm pretty deep in the feels these days and I've really missed this outlet.  I'm glad to come back to it, hopefully next time will include less morose wonderings and more chocolate <3


Roasted Acorn Squash with Golden Smashed Potatoes
Yield: Enough to feed you for a few days

Ingredients:
  • 1 acorn squash
  • 2 small onions
  • 2 giant cloves of garlic, divided
  • olive oil
  • seasonings of your choice
  • parmesan
  • 4 Yukon gold potatoes
  • tablespoon of butter
  • a bit of sour cream or greek yogurt

Directions:
Preheat your oven to 375 degrees F and line a rimmed sheet pan with tinfoil.

Prep your potatoes by washing them and cutting them into chunks, throw these chunks into a medium pot and cover with water and add a dash of salt.

With a large, sharp knife, cut your acorn squash in half so you can scoop out the innards/seeds with a big spoon.  Then proceed to cut your squash into pieces/chunks/slices, whatever you like.  (Word of advice, I did not cut the rind off of my squash pieces and while that's fine, it's definitely not edible and kind of annoying to slice off of each individual piece as I'm eating it, so maybe slice yours off.)
Peel and slice your onions into thin rings, then mince a clove of garlic.  Toss everything together on a sheet pan with a generous pouring of olive oil and seasonings of your choice (I used chili powder, cumin, salt, pepper, garlic powder, and some thyme).  Throw the sheet pan into the oven and bake for 20-30 minutes, until tender.  In the last 10 minutes of baking, open the oven and sprinkle some parmesan on top to let it melt and meld with the squash.

While the squash is roasting, place your pot of potatoes on to boil.  Once the water is boiling maintain a steady boiling simmer and continue until your potatoes are tender (i.e. can be stabbed easily with a fork).  While the potatoes boil mince your other clove of garlic.  Once the potatoes are done, place in a bowl and immediately throw in your garlic, sour cream, salt/pepper, sour cream/yogurt, and even a dash of ranch if you're feeling fancy.  Oh, and parmesan, absolutely throw in some parmesan.  Amounts are up to you, you need only smash your potatoes to your desired consistency.

At this point the squash should be done and cooling, and you need only to greedily heap your plate with everything you just made.  Good job, you have a meal.

Sources: an Ellen original


6.21.2016

Coconut Sticky Rice with Mango


  I'd forgotten how much I like the process of things.  Things meaning food, and the making thereof.  I feel like coming out of school I was a directionless, lifeless mess that needed a solid month of detox.  Finals and life happenings whooped me real good.

  This meant that my kitchen suffered a little bit.  I had just dropped a solid amount of money on a new computer, I was spending a couple of weeks working 2 jobs while I was working on putting in my two weeks as a barista, and then I spent a lot of time stressing out over how on earth I was going to make a living off of tips by shoving burgers at people's faces.  Also, do I know where or whom I'll be living with once my lease ends in August?  Nope.  Sure don't.

  I'm figuring it out.


  But all that crud aside, this is my mental health summer.  Even though I'm working 6 days a week my schedule is still fairly flexible, and Sundays are always my chill day.  And that's been hella nice.  Once my brain calmed down and I got back into a yoga routine, I started to relax a bit more.  I've been making time for friends and fam, but also learning to enjoy time by myself.


  And so I've gotten back into the process.  It started with a humble loaf of banana bread that I brought into work with me one night.  Servers and bartenders alike gobbled it up, and it made me remember how much I love making and sharing kitchen creations.  It also made me remember the summer I spent in Arizona, where I made a whole lot of creations but had very few people to share it with.  Backtracking to those days, sticky rice and mango came up.  I distinctly remember my aunt leaving the recipe out for me when she was at work, and being unemployed and bored, naturally I made it.


  If you recall, this dessert was not only delicious and perfect for a hot summer day, but it was also the icebreaker between me and and basically the only friend I made that summer, Francesco. Remembering all that was humbling, very humbling.  It also reawakened my creative spark.  Immediately I was off, hunting through Woodman's for the absolute perfect rice like a crazy lady.  And damn did it feel good to be back.


  So, by all means, wherever you are in your life this summer, make this rice.  Maybe take a heaping portion to your next door neighbor, even if he doesn't speak your language.  Maybe eat it for breakfast, cold and from the fridge, before you rush off to work.  I just can't tell you how therapeutic it is to wash rice, let the grains flow from your fingers, and then steam it.  This dessert is simple but it does take some time, so plan accordingly.

  I'm off to continue my summer meanderings, including but not limited to sunbathing, speaking broken Spanish thank you's to the kitchen staff and dishwasher for making tacos for the servers on slow Tuesday nights, nods of solidarity to fellow restaurant employees as we cross paths wheeling trash to the communal dumpsters, getting frustrated with bad tippers, wrestling with class schedules, creating fantastic inside jokes with new friends, etc.

  Take after this rice and soak up these lovely summer days while you can.


Coconut Sticky Rice with Mango
Yield: serves 6

Ingredients:
  • 1 1/2 cups glutinous (sweet) rice*
  • 1 1/3 cups well-stirred canned unsweetened coconut milk
  • 1/3 cup plus 3 tablespoons sugar
  • 1/4 teaspoon salt
  • 1 tablespoon sesame seeds, toasted lightly (or shredded coconut is also delicious for a topping)
  • 1 large mango, peeled, pitted, and cut into thin slices (at least 24)
*Rice should be quite opaque, meaning it's not as translucent as other grains.  That being said, don't stress about it too much, any good white, short-grain rice will do in a pinch. The brand I used was Three Horses Sweet Thai Rice.

Directions:
In a medium bowl wash rice well in several changes of cold water until water is clear (Mine never got totally clear, but after about 8 washes there was a noticeable difference in the clarity.). Cover the rice in cold water and cover with plastic wrap, let soak overnight at room temperature.

Drain rice well in a fine mesh sieve (Alternatively, a colander and cheesecloth also works well.). Set sieve over a large deep saucepan of simmering water (sieve should not touch water) and steam rice, covered with a kitchen towel and a lid, 30 to 40 minutes, or until tender (check water level in pan occasionally, adding more water if necessary). 
While rice is cooking, in a small saucepan bring 1 cup coconut milk to a boil with 1/3 cup sugar and salt, stirring until sugar is dissolved, and remove from heat. Keep mixture warm.

Transfer cooked rice to a bowl and stir in coconut-milk mixture. Let rice stand, covered, 30 minutes, or until coconut-milk mixture is absorbed.  Rice may be prepared up to this point 2 hours ahead and kept covered at room temperature.

While rice is standing, in cleaned small pan slowly boil remaining 1/3 cup coconut milk with remaining 3 tablespoons sugar, stirring occasionally, 1 minute. Transfer sauce to a small bowl and chill until cool and thickened slightly.

To serve, mold 1/4 cup servings of sticky rice on dessert plates. Drizzle desserts with sauce and sprinkle with sesame seeds or coconut. Divide mango slices among plates.

Sources: Lightly adapted from epicurious.com


4.29.2016

Salted Chocolate Peanut Butter Brownies


  I'm winding down fast, folks.  I love school, learning, and all that fun stuff--but the tail end of this semester is absolutely relentless with all of its decisions, expectations, and unpredictable happenings.  Caught in these situations, I tend to overeat and feel very numb.  Class notes are a thing of the past, and even scrolling through happy Pinterest things doesn't appeal to me.  I have projects on projects and I'm not doing anything.  Whoops.  Enter Spotted Cow and Gilmore Girls, and lots of sweet potato fries.

  But between these bouts I'm generally pretty productive.  Sunday night, for example, I spent on the 3rd floor of the library, and I mean literally cross-legged on the floor, studying until I couldn't physically see and the place was closing.  

  Balance, balance.


  It's been difficult finding baking inspiration, particularly in my teeny apartment kitchen that's generally full of friends and roommates and a whole lot of garlic action.  I find myself sort of automatically telling people that baking is what I do for fun and to relax, even though I haven't actually frosted a cupcake in a solid 6 months.

  Finallyyy one day I got out of lecture, the sun was shining, and I had to make my why over to the following scheduled class discussion.  I started walking, turned to my classmate and said I was out, and then caught the next bus home.  I was so sick of calculating participation points, talking about all these different "-isms" and how they relate, that I just up and bailed.

  Whoops.  But not.  Cuz these brownies were the result.


  And in the spirit of such rebellion, here I am writing this blog post instead of doing the other 8 million things I should be doing before I go and work the rest of my Friday away, thanks to the apartment showing that stood me up and effectively wasted my morning.  These brownies were born out of desperation, you could say.  I was an improvising whirlwind the afternoon I made these, and I even used my roommate's Nutribullet to make a rough powdered sugar.  Fun fact, you can do that with granulated sugar in a pinch.

  And now we go back to real life, with a brownie.

  Here's to more goods coming your way soon <3


Salted Chocolate Peanut Butter Brownies
Yield: about 12 brownies

Ingredients for the brownie:

  • 8 tablespoons (1 stick) unsalted butter
  • 6 ounces chocolate, coarsely chopped
  • 1 teaspoon instant coffee or espresso powder (optional)
  • 3/4 cup granulated sugar
  • 3 large eggs
  • 1 teaspoon pure vanilla extract
  • 2/3 cup all-purpose flour
  • 1/2 teaspoon baking powder
  • 1/4 teaspoon salt
  • coarse sea salt, for topping


Ingredients for the peanut butter topping:

  • 4 tablespoons unsalted butter, melted
  • 1/2 cup powdered sugar
  • 3/4 cup smooth peanut butter 
  • 1/4 teaspoon salt
  • 1/2 teaspoon vanilla extract


Directions:
Preheat oven to 325 degrees F.  Grease an 8x8 inch baking pan and line with parchment paper, grease the parchment as well.

In a small bowl, whisk together the flour, baking powder, and salt.

Boil two inches of water in a medium saucepan.  Combine butter, chocolate, and coffee powder in a heat proof glass or metal bowl and place over the simmering water.  Stir constantly until the chocolate and butter are melted.  Remove the bowl from the heat and let the mixture cool slightly.  Stir in the vanilla (or, in my case, some spiced rum I had on hand...).

Whisk granulated sugar into the chocolate and butter mixture.  Then, fully ensuring that the chocolate mixture isn't too warm still, begin to whisk in the eggs one at a time.  Fold in the flour mixture and spoon into prepared pan.

To make the peanut butter mixture, whisk together peanut butter, melted butter, powdered sugar, salt, and vanilla until smooth. From here you can either pour the mixture on top of the brownie batter and use a butter knife to swirl the two together, or you can pour it into a large ziploc bag to and pipe it on top of the brownie batter before swirling.  Sprinkle the top with coarse sea salt before popping into the oven.

Bake for 40-45 minutes, or until a skewer/toothpick inserted comes out with just a few moist crumbs (but not straight up liquid-y batter).  Let cool for about 30 minutes before noshing.

Sources: adapted from Joy the Baker (aka queen)


3.09.2016

Malted Milk Rice Krispies


  FRIENDS.  I'm writing I'm writing I'm not writing a paper, I'm not writing because I have to, I'm not writing to be persuasive or grammatically correct or to utilize my critical thinking skills I'm just WRITING.  I'm writing because I want to talk to you and I want to wax poetic about things like rice krispy treats.

  I missed you.


  I've had a hella couple of weeks.  Obligations on top of homework on top of just really frustrating things that kept happening.  So I'm giving myself this evening off.  I stayed away from tear-inducing paper brainstorming sessions and went to some office hours instead.  I did some awkward socializing I really didn't want to do and talked to some alumni about their experiences studying a foreign language while eating provided refreshments.  I goofed around with classmates and spoke up during discussion sections even when I wasn't super confident.  I went home for meals to play with the cat and laugh with my awesomesauce roomie.  I kinda liked today, taking it easy was nice.  And much needed.

  But these krispies were not made during a time of take-it-easiness.  In fact, these were made months ago...wowza.  However, they do have some fond memories attached to them.  On a texture note, personally I found them to be best when microwaved for just a bit once they've been chilling on your counter for a day or two.  Then, if it all possible, you should eat them fairly later in the evening in your living room after a fun, if long night out.  Your cat will probably meow/beg at you, and that's fine, just don't forget to share with the good friend you have crashing on your cheap futon.


  Late at night with friends is definitely the best time to consume these sweet, malty, and lightly salted treats.  Because the malted milk will remind you of your dad, and how he taught you the three best ice cream toppings (although definitely not altogether...): Magic Shell, Creme de Menthe, and Malted Milk Powder.  You'll sit and ruminate on this, and get all serendipitous.  And in your mildly buzzed state you can discuss this with said friend crashing on your futon, while a cat rubs against your legs and purrs.


  If you can't finish this rich little treat, wrap it up and save it for the morning that's coming in just a few hours.  Go to bed, savoring this slightly fancier version of a treat you have always always always loved so much, and don't forget your water bottle because you will be very thirsty very soon.  Sleep, dream.  And then the next day, go to brunch with your friend and drink coffee or tea.  Eat great food in a small place that smells amazing.  Accept that it's the end of the weekend, and believe that you can accomplish all that you have to this week.  Remember that college is for learning, but also very much for making memories and having fun.  As you tidy up after your friend, give him a bagful of rice krispy love to share with his roomies.  Also, thank Joy the Baker for an amazing recipe you managed to find a 30 minute time window for to throw together and photograph.


  Keep baking, keep piano playing, keep writing, keep doing whatever you have to do to keep yourself in a healthy state of mind.  That is so much more important than whatever else you're putting ahead of it.  Because hey!  You never know where those quirky little habits can take you.  They may even get you published in the school newspaper. :)


Malted Milk Rice Krispies
Yield: 9 squares, or 12 smaller ones

Ingredients:
  • 6 tablespoons unsalted butter
  • 8 cups mini marshmallows + 2 cups mini marshmallows
  • 1/4 teaspoon salt
  • 6 cups rice cereal
  • 1/3 cup malted milk powder
  • 1 cup coarsely chopped Whoppers candy
  • Coarse sea salt, for topping

Directions:
In a large saucepan over medium heat, melt the butter.  Melt butter until it begins to crackle and sizzle.  This means the water is cooking out of the butter and the butter will begin to brown.  Add 8 cups of marshmallows to the melted butter just as it begins to brown and reduce heat to low.  Add salt and stir until the marshmallows are completely melted, and the marshmallows and butter are thoroughly combined.  Quickly add the rice cereal and malt powder and stir to combine.  Now stir in the remaining two cups of mini marshmallows.

Allow mixture to cool just slightly before adding 3/4 cups of the Whoppers candy.  Stir until just combined.

Press the mixture into a 9×9-inch square greased pan.  Use a greased piece of wax or parchment paper to firmly press the mixture into the pan.  The krispies will be thick.  Press the remaining Whoppers pieces into the top of the treats.  Allow to rest at room temperature until set and sliceable.

Slice into 9 large squares or 12 smaller and wrap individually.  Treats will stay fresh for up to five days.


1.04.2016

Dark Chocolate Banana Breakfast Bars & 4 Years(!!)


  I'm in a pretty solid melancholic trance these days.  New Year's and Christmas, old face new faces, first semester at a new school finished with still no clear path in sight, the ups and downs involving matters of the heart.  I'll admit it, I'm pretty rocked.  I'm watching my parents build the house they've always wanted and will probably grow old in.  I'm watching my little sis navigate her life and take care of a dog that managed to steal my heart freshman year of college when I ran back home to meet her sweet puppy face.  My older sisters never cease to amaze me, watching their respective journeys over 2015 has been fantastic.  I'm so glad for them and who they are.

  And me?  Considering the fact that this time last year I was a hot mess living in my parent's mobile home looking for a job, daydreaming about hot desert suns, and having panic attacks while filling out my college transfer paperwork, I'd say I've come pretty damn far.


  Also, I 100% missed my 4 year blogging mark back in December.  I think if you knew about the emotional turmoil I was floundering in and my workload in both of my jobs and finals you'd definitely understand.

  But that's unimportant, can we just dwell on 4 years for a second?  I was just a wee 16 year old when I first hit "publish" on a post about scones that was already too in depth and really long winded.  Obviously some things never really change.
  
  
   Something did change recently though.  I got hit with writer's block and had to spend some time nursing bruised hopes and emotions.  Tonight was the first time I really had the motivation to do this stuff.  I spent nearly a month feeling suffocated by my own pressure to just write and bake and take pictures and just publish this post about banana bars that I made way the heck back in October.  Or November.  I forget.


  These simple little cake-y bars drizzled with the darkest chocolate were my saving grace when I was running out the door with nigh unto 3 minutes before my bus arrived.  Keys in had, headphones around the neck, backpack weighing approximately 800000 tons, I'd half walk half run and shovel something into my face in the process.

  Sometimes I'd be commuting with the same people, sometimes the bus would be so packed that those unfortunate enough to get on later in the game were literally sardined into the aisles.

  What a life.


  Coming home at the end of the day I'd kick off my shoes, drop to the futon, and place my head in my hands trying not to get overwhelmed by homework, expectations, grades, the forced interactions, and the pangs of loneliness that came from being in an entirely half hearted situation.

  It's hard, man.  College is not something you can just ease back into, it's more like you need to drown in it for a little bit until you learn to tread water like everyone else.


  But, I made it.  My final grades are living proof that I'm not as moronic as I thought I was, and sometimes I even enjoyed the process.  Here's to more of that happening this semester.

  Until then, Imma just gather my wits about me.


Dark Chocolate Banana Breakfast Bars
Yield: about 12 bars

Ingredients for the bars:
  • 2 medium bananas, a bit past their prime
  • 1/4 cup vegetable or coconut oil
  • 1/4 cup packed brown sugar
  • 1 large egg
  • 1 teaspoon vanilla
  • 1/2 teaspoon salt
  • 1/2 teaspoon baking soda
  • 1/2 cup flour (whole wheat would be great, I used AP)
  • 1 cup old fashioned oats
  • Some chocolate chips if you fancy
  • 1/4 cup fine dark chocolate (that random little chunk of goodness hiding amongst the odds and ends in your cabinets)
  • 1 tablespoon peanut butter

Directions:
Preheat oven to 350 degrees F.  Spray an 8x8 inch pan with cooking spray/grease with butter.

Place bananas into a large bowl and mash them with a fork or potato masher until only small chunks remain.  With a wooden spoon, stir in the oil (if using coconut, make sure you melt it to a liquid if it's solidified on you) and brown sugar.  Then stir in the egg, vanilla, and salt.  Stir in the baking soda.  Add the flour, oats, and optional chocolate chips and stir until just mixed, some lumps may be present but dat's okay.  Spread into yer pan!

Bake for 18-22 minutes, until browned around the edges and set in the center.  Cool completely before slicing.

But don't forget the drizzle!  Melt the chocolate and peanut butter in a microwave safe container on 50% power in 30 second increments, stirring in between.  Place melted chocolate into a piping bag or a ziploc with the corner cut off.  Drizzle!

Enjoy within 2 days or freeze for up to a month (they're so good from the freezer after a minute or two).  

Sources: adapted from the awesome Dorothy of Crazy for Crust